
How to Teach Straw Drinking
Posted by Debra C. Lowsky, MS, CCC-SLP on 9th Nov 2011
1. To start, cut a regular straw in half. Not only is a shorter straw easier to handle, but it also takes less strength for a child to suck liquid from a shorter straw.
2. Dip the straw into a cup with liquid preferred by the child. Place the tip of your pointer finger over the top of the straw to keep the liquid in the straw. Remove the straw from the cup, keeping the top of the straw covered with your fingertip.
3. Place the straw on the child's lips at a slightly tilted down angle (so that if you release your finger, the liquid will flow into the mouth).
.

.
4. Remove your fingertip, allowing the liquid to flow into the child's mouth. The goal here is for the child to comprehend that he/she is getting liquid from the straw. As you are doing this, tell the child to “take a sip.”
5. Once the child comprehends the idea of getting liquid from a straw, instruct him/her to close his or her lips around the straw. When the lips are closed around the straw, release your fingertip for the liquid to come out. You may have to provide lip closure exercises to assist the child with this skill. Pinching the lips together may help. Stretching the lips prior to straw drinking may help as well. For more information on lip closure, check out this article and this one.
6. Once the child is able to close his/her lips around the straw with ease, it is time to work on sucking liquid from the straw. Place the straw just inside the mouth without releasing your fingertip from the top of the straw. When a sucking response is initiated, release the liquid. Quickly repeat so the child understands the idea of continuous sipping.
7. Keep practicing. Continue until the child understands that he/she needs to suck to get liquid, then progress to a regular straw that has not been cut in half. This may take more than just a few times. Be patient, calm, and supportive, praising all the while. . To increase difficulty once the child can easily sip through a straw, use milkshakes or fruit smoothies. Thicker liquids require more work!
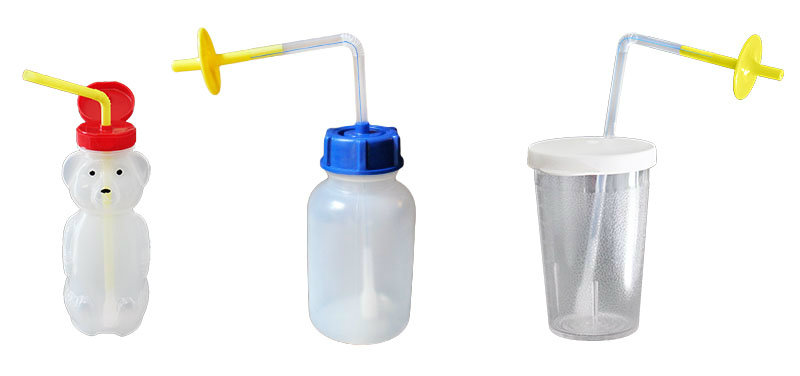
ARK's Bear Bottle, Cip-Kup, or Sip-Tip can also be used to make this transition easier when it's time to introduce a straw cup. These cup sets come with a special valve that prevents liquid from flowing back into the cup. In other words, the straw stays "full" and liquid stays at the top of the straw, so just a tiny bit of effort is required to take a sip. This makes drinking easier for individuals with poor oral motor skills or a weak suck. And it also makes learning how to drink easier and faster, as it helps children easily get that "aha!" moment of understanding that they need to suck to drink:
1. Squeeze the bottle (or press the lid of the Sip-Tip) until the straw is full of fluid. Then give it an extra squeeze onto a napkin to demonstrate that liquid comes out of a straw. Place the straw just inside the child's mouth and squeeze a small amount of liquid into the mouth. Repeat until the child gets the idea that he/she needs to suck to drink.
2. When the child is ready, squeeze the fluid only partially up the straw, stopping a short distance below the top. Because the liquid isn't as high in the straw, it will require slightly more effort to drink.
3. Once the child becomes comfortable drinking from this distance, lower the level of liquid again and repeat.
4. Continue repeating until the child can suck fluid all the way up the straw by him/herself.
.
I hope you find these tips useful!
Debbie
Debra C. Lowsky, MS, CCC-SLP
.