
Jaw Grading & Stability
Posted by Debra C. Lowsky, MS, CCC-SLP on 16th Jun 2011
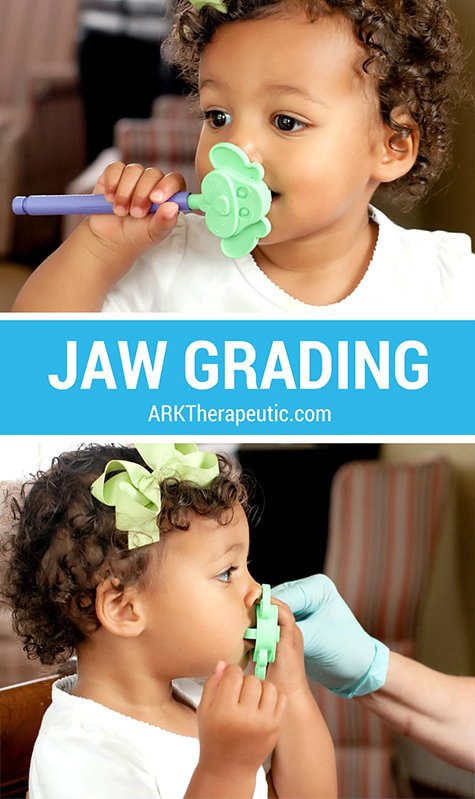
Jaw grading is the ability to visually judge how far you need to open your mouth to take a bite out of certain foods and to say certain speech sounds. For example, say "ooooo" versus "aaahh" - can you feel the height difference in your jaw? It needs to open just a little bit for "eeee," but wider for "oooh." Or, imagine taking a bite out of a thin cracker versus a burger - there's a big difference in jaw heights.
.
.
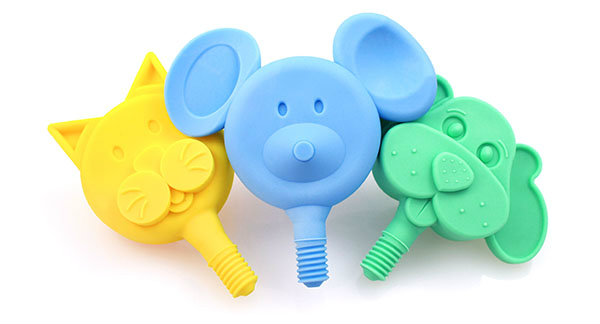
One of my favorite ways to work on jaw grading is with the Z-Vibe Animal Tips. Individually, each tip is a great sensory oral motor tool - they have lots of different 'pockets' for the tongue to explore, textured surfaces to experience, and friendly faces that kids really gravitate to.
.
.
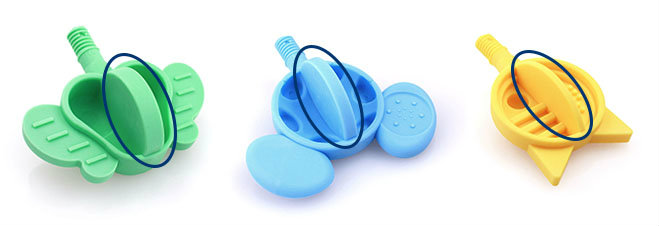
The Animal Tips also have bite blocks on their reverse sides to practice jaw grading (the parts circled in the image above). The Dog Tip has the thickest block, the Mouse Tip has a thinner block, and the Cat Tip has the thinnest. Because they are three distinct thicknesses, you can use them in sequence to gradually increase the difficulty level:
1. Start with the Dog Tip. It has the thickest bite block, so it will be the easiest to visually judge and bite down on. Instruct the child to bite down on the bite block and hold for a count of 3-5 seconds. Release and repeat.
2. Once the child can visually judge how to correctly bite on the Dog Tip, progress to the Mouse Tip and repeat the process. The Mouse Tip's bite block is not as thick, and so it will be a little harder to judge.
3. Once the child can visually judge how to correctly bite the Mouse Tip, progress to the Cat Tip. The Cat has the thinnest bite block, and so it will be the most difficult.

Before you start, be sure to explain to the child what you're doing and why. This helps increase compliance and decrease anxiety. Also, make sure that the child is not chewing on the bite block. You want them to hold the bite (this is called a sustained bite).
Last but not least, pay attention to the jaw as well. You don't want the jaw to open too wide or not enough. The child needs to practice gauging what the "just right" height is. This may take some time and practice before they get it.
For a visual of the above, see the video below (the first part of the video is about mouthing. Skip to 1:25 for jaw grading):
.
.
You can also work on jaw grading by allowing the individual to mouth and explore the Animal Tips. Their cheeks, ears, faces, etc. all differ in height/thickness to provide a range of high and low jaw positions. For example, you can present the Cat's ears to the individual have him/her bite the ear. Or, you can hold the tip sideways and have them bite on the main part of the face/tip, which will provide a different height and require the jaw to open wider. I also like using the Y-Chew for the same reason - the three "arms" of this chew tool have different thicknesses to practice jaw grading.
Before you can work on jaw grading, keep in mind that the child may need to see a physical and/or occupational therapist for trunk control and proper positioning. The child will need to have stability in the trunk, for example, before he or she can have control over the mouth.
For more related exercises on jaw strength & stability, click here.
.
All my best,
Debbie
Debra C. Lowsky, MS, CCC-SLP
.