Button Pull Lip Closure Activity
Posted by Debbie Lowsky, MS, CCC-SLP on 26th Sep 2020
Lip closure - being able to create and maintain a seal with your lips - is a fundamental oral motor skill for successful speech and feeding development.
For feeding, it's how we do things such as drink from a straw, remove food off of a spoon, keep food in our mouths while we chew, keep saliva in the mouth at rest (which prevents drooling), etc. For speech, it's how we produce labial sounds (/p/b/m/) to say pop, mom, boy, etc., which are all articulated with the lips together.
Being able to round the lips is important, too. Lip rounding is needed in order to blow bubbles, blow out candles, blow a kiss, and say certain speech sounds like "ohhh".
A really fun way to work on both lip closure and lip rounding is with ARK’s proButton™ Set. These oral motor tools have differently sized button-shaped ends that you can use for an engaging "button pull" exercise that provides isometric resistance.

.
GETTING STARTED:
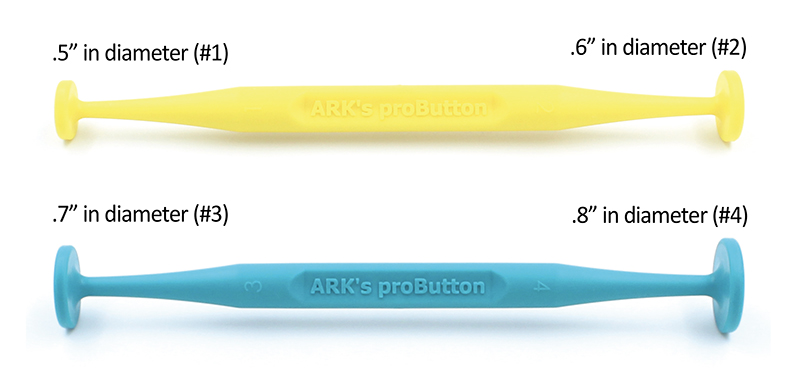
Each proButton™ set includes two double-sided handles for a total of four different “button” diameters: .5”, .6”, .7”, and .8”:
Start with the largest size that fits in the individual’s mouth comfortably. You may not use every size for every individual. For example, the largest .8” will be too big for most young children. Or the smallest .5" may be too small for some adults.
.

.
ORAL MOTOR EXERCISE #1: HOLD AND SQUEEZE (AT MIDLINE)
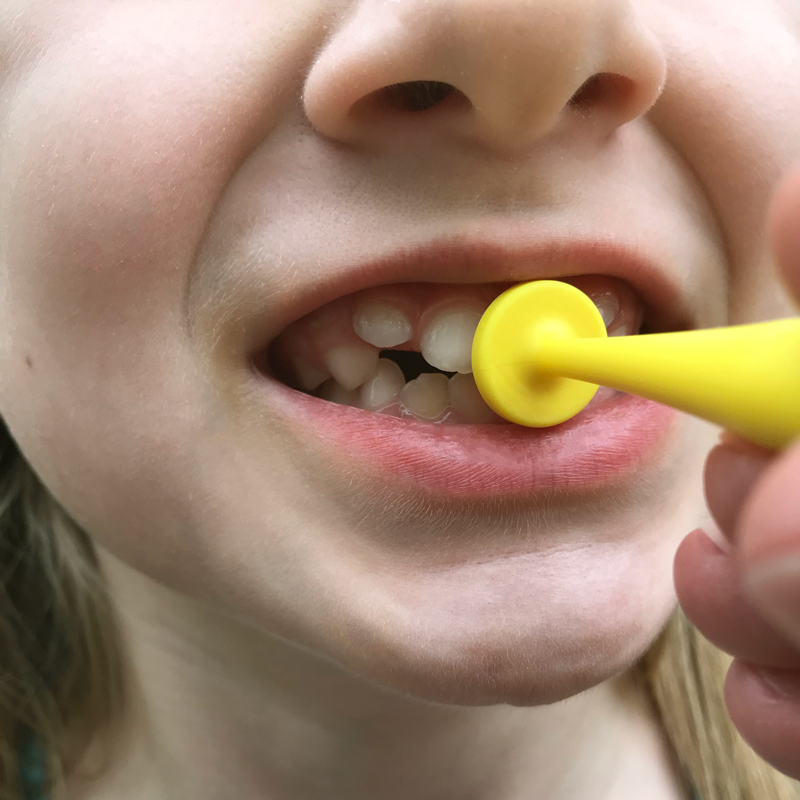
- Place the button inside the lips, but in front of the teeth, at midline. Instruct the individual to close his/her lips around the button and hold, squeezing for 10-15 seconds.
- Repeat twice more (do a total of 3 sets).
- Once the individual can hold the button in place, proceed to the “tug and pull” exercise below.
.

.
ORAL MOTOR EXERCISE #2: TUG AND PULL (AT MIDLINE)
- Place the button inside the lips, but in front of the teeth, at midline. Instruct the individual to close his/her lips around the button.
- For resistance, gently pull the handle toward you (away from the mouth) for 10-15 seconds. Instruct the individual to maintain closure while you tug. Make it a game and say, “Don’t let me get it out!”
- Repeat twice more (do a total of 3 sets).
- Continue practicing until the individual can maintain a strong seal around the button throughout this whole exercise, then progress to the next exercise below.

.
ORAL MOTOR EXERCISE #3: TUG AND PULL (MIDWAY & CORNERS OF THE MOUTH)
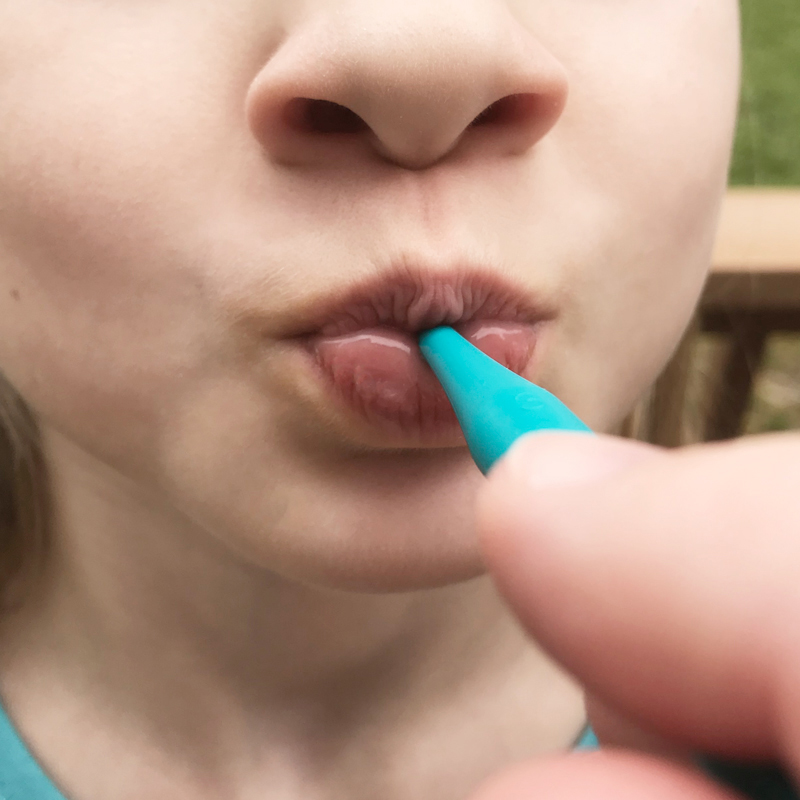
- Lip closure at midline is important, but we also want lip closure across the full width of the lips, all the way to the corners of the mouth. So once the individual has mastered lip closure at midline, move the button midway between midline and the corner of the lips to one side. Repeat the “tug and pull” exercise above.
- Then move the button all the way to the corner of the mouth on the same side and repeat the “tug and pull” exercise.
- Repeat on the other side. Do a total of 3 sets.
- Continue practicing until the individual can maintain a strong seal around the button throughout this whole exercise.
Once the individual can complete all of the above exercises with the current diameter, progress to the next smaller diameter and repeat the exercises again.
The goal is to work towards being able to use the smallest (#1) diameter, as this requires the most refined movement and control of the lips.
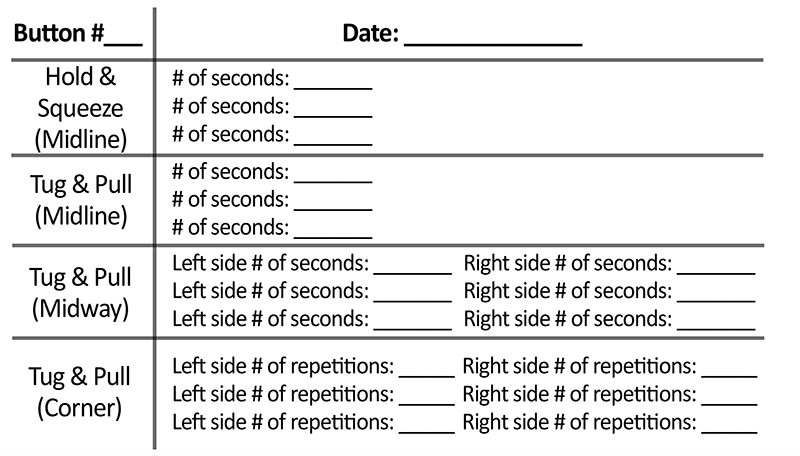
Keep track of progress using an extended version of a chart like the one below:
.

.
EXTRA NOTES/TIPS:
- Make sure the lips are doing all of the work, without the head or body pulling or moving to assist. The goal is to allow the lips to really get an oral motor workout here.
- Positioning is very important. Make sure the individual has a correct sitting position and posture. The ankles, hips, and knees should be at a 90-90-90 degree angle. Consult with an OT and/or PT if necessary.
- Do not allow the individual to bite on the tools. These are not chew tools. If the individual needs something to chew on, check out these chew tools.
- Establish a baseline and adjust accordingly. 10-15 seconds and 3 repetitions is a general guideline, but may vary depending on the individual’s age and abilities. For example, if the individual’s baseline is already at 10 seconds, you may want to bump up to 15 seconds.
- If at any point the individual cannot complete an exercise, note how far the individual got by counting the seconds. Then take a break. Work on another goal/activity and revisit the exercise later in the session. If it’s still too difficult, revisit in the next session and continue practicing.
- Follow up each exercise with a functional task when applicable, such as drinking from a straw, maintaining lip closure for a specified amount of time during an activity, articulation practice, etc.
- Please note that when it comes to lip closure, one side may be weaker than the other. You may need to work more on the weaker side.
- Note: the proButton is also available in tip attachment versions for the Z-Vibe. Check out the Button Tips here. The same exercises apply for both versions - the proButton and the Button Tips.
For more lip closure exercise ideas, check out these related articles:
.
I hope you love these tools and exercises! They're fun ones!
Debbie Lowsky, MS, CCC-SLP
.

