
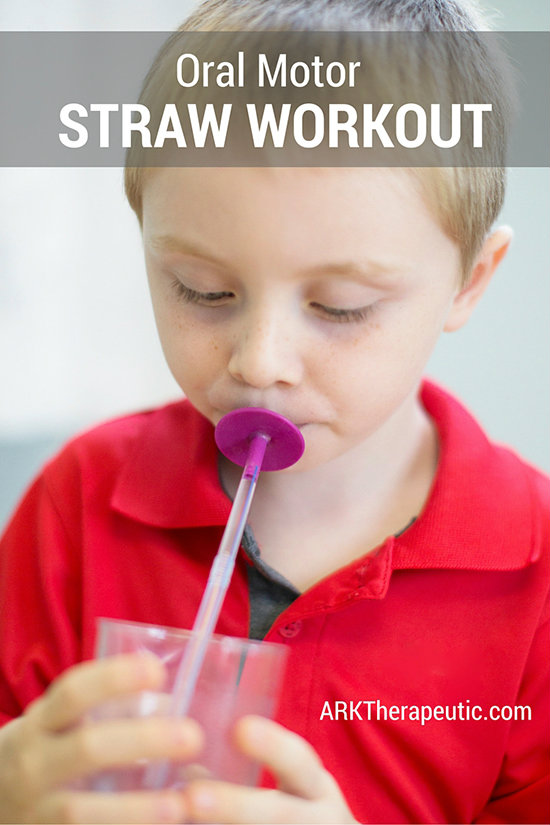
Oral Motor Straw Workout
Posted by Debra C. Lowsky, MS, CCC-SLP on 7th Apr 2017
Below are directions for a Straw / Lip Blok program I've used with many of my kids over the years. I usually do this in conjunction with tongue thrust therapy when their swallowing pattern needs to be changed. And it also helps work on oral tone and tongue retraction.
.
.
What You'll Need:
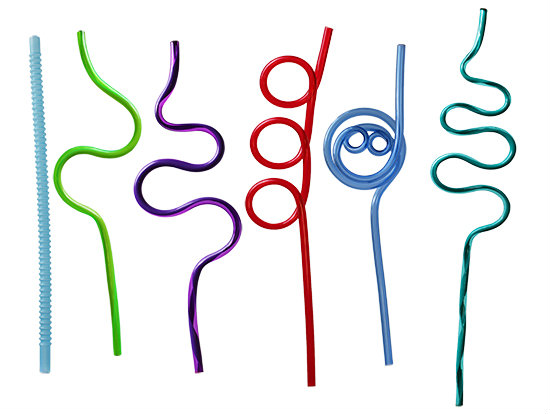
1. Krazy Straws. I typically use the ones in the picture below, in sequence from left to right. You may not be able to find these exact straws; I myself have to find new ones from time to time because I can't find my go-to ones online anymore. But you can always put together your own set of straws - just get a bunch of different styles and drink from them yourself to find the right ones.
The main goal is to have a sequence of straws that are increasingly difficult to suck thin liquids (water, juice, milk, etc.) through. As a general rule, the more loops and/or curves in the straw, the higher the difficulty level and the harder it will be to suck.
2. Flexible Lip Bloks. There are two different kinds of Lip Bloks - rigid ones (yellow, blue, or turquoise) and flexible ones (orange or magenta). The regular ones are rigid and pre-cut for you. The flexible ones are, well, flexible :). Which means you can trim them to any length.
Both kinds are typically pressed INTO regular straws. But because the flexible ones have some “give” to them, they can also be pressed OVER Krazy Straws. So it’s the flexible ones you’ll want for this activity.
Hint: trimming the stem of the Lip Blok (the part that you’ll press over the straw) and/or dipping it in a bit of water will make it easier to press over the Krazy Straws.

Directions:
Depending on the age and cognitive level of the child, I typically start by telling them about the benefits of straws and what goals we’ll be working on. This usually helps keep any anxiety at bay and helps them be more willing to participate.
Then I have the child drink from a regular straw. I pinch the straw just before the lips, then remove the straw from the mouth. This is to see how much of the straw they're putting inside the mouth before we start the straw progression. Document this length as a benchmark / starting point to refer to later on. Ideally the goal is to only put ¼" of the straw inside the mouth - that ensures that liquid is deposited in the front of the mouth where it's easiest to manage, and that's where we have the best oral positioning (the lips seal more, the cheeks tense more, and the tongue retracts more).
For the purposes of the steps below, I'm going to call the straws that were pictured above (from left to right): the straight straw, green straw, purple straw, red straw, blue straw, and teal straw.
1. First use the Lip Blok with a regular straight straw. Once the child can drink from this effortlessly, move on to the next step.
2a. Move the Lip Blok onto the green straw. Once drinking is effortless, move on to the next step.
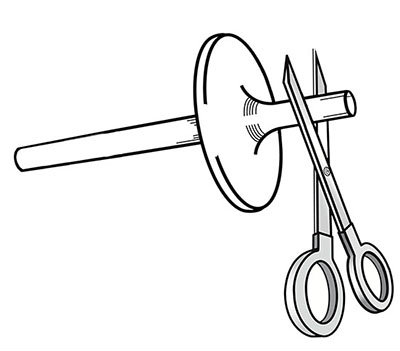
2b. Use a pair of scissors to trim the mouthpiece of the Lip Blok just slightly (as in the picture below except not that much. Trim off ⅛”). Continue using the now-shorter Lip Blok with the same green straw. Once drinking is effortless, move on to the next step.
3a. Move the Lip Blok onto the purple straw. Once drinking is effortless, move on to the next step.
3b. Trim the Lip Blok an additional ⅛". Continue using the now shorter Lip Blok with the same purple straw. Once drinking is effortless, move on to the next step.
4a. Move the Lip Blok onto the red straw. Once drinking is effortless, move on to the next step.
4b. Trim the Lip Blok an additional ⅛". Continue using the now shorter Lip Blok with the same red straw. Once drinking is effortless, move on to the next step. .
5a. Move the Lip Blok onto the blue straw. Once drinking is effortless, move on to the next step.
5b. Trim the Lip Blok a final ⅛" (this is the last time you'll trim it). At this point the total length of the mouthpiece should be ¼". Continue using the now shorter Lip Blok with the same blue straw. Once drinking is effortless, move on to the next step.
6. Remove the Lip Blok and have the child drink from the blue straw alone. Measure how much of the straw goes inside the mouth. If it's only ¼", move on to step 7. If it's more, go back to using the red straw, this time without a Lip Blok. Monitor for correct placement. When the child can maintain correct placement, move on to step 5a again. .
7. Use the teal straw (the hardest one) without using a Lip Blok. If no more than 1⁄4” of the straw’s tip is inside the mouth, switch to a regular drinking straw. Continue monitoring placement to ensure that the child maintains ¼". If not, go back to step 4a and repeat the rest of the steps.
.
Note: Even if the child can effortlessly complete a step right away, I do like to have them stay on the same step for at least a full week. Not only does this give him/her time to really acclimate, but it also helps build confidence for the next steps, which are more difficult.
You may have noticed the general rule / pattern: Use the Lip Blok with a straw, trim the Lip Blok ⅛" and use it with the same straw, then move the Lip Blok onto a harder straw and repeat. This sequence is by no means set in stone - for many children I have to make adjustments, tailor it to their needs, repeat steps or jump ahead, and so forth.
A key factor in every case, as with most therapy goals, will be homework. I tell the parents that the child should drink using the Lip Blok as often as possible (ideally for every drink).
Also, the straw should be centered in the middle of the lips while drinking. If it’s not, check for correct posture. The child should not be bending his/her head forward to reach the straw. If possible, have him/her hold the cup and bring the straw to his/her lips. Using colder liquids may help increase awareness.
How long does it take to complete the whole workout? It could take anywhere from 3 months to a year or more. You're re-training the tongue and oral positioning, so patience is key. It also really depends on the child's goals and abilities, other intervention strategies, if homework is followed through with, etc.
With some kids, we never finish the program because their oral positioning is fixed through other methods before we finish all of the steps. Afterwards, though, I always recommend continuing to drink from a straw as often as possible, as a safeguard to maintain proper oral positioning.
Have patience and be persistent, and of course, have fun!
Debbie
Debra C. Lowsky, MS, CCC-SLP
.